Addon domains
Addon domains allow you to host multiple domain names with distinct websites and mailboxes on a single hosting account.
If the Addon Domains section is not available in your hosting Control Panel, this feature may not be included in your plan. You can contact us through our ticketing system for more information.
In this article, you can find information on:
- Creating addon domains
- Parking domain names to addon domains
- Managing the files of addon domains
- Managing the mailboxes of addon domains
- Managing the mailing lists of addon domains
- Managing the PHP settings of addon domains
- Setting up web access protection for addon domains
- Creating URL redirections for addon domains
- Enabling server-side caching for addon domains
- Viewing site statistics for addon domains
- Managing the subdomains of addon domains
Creating addon domains
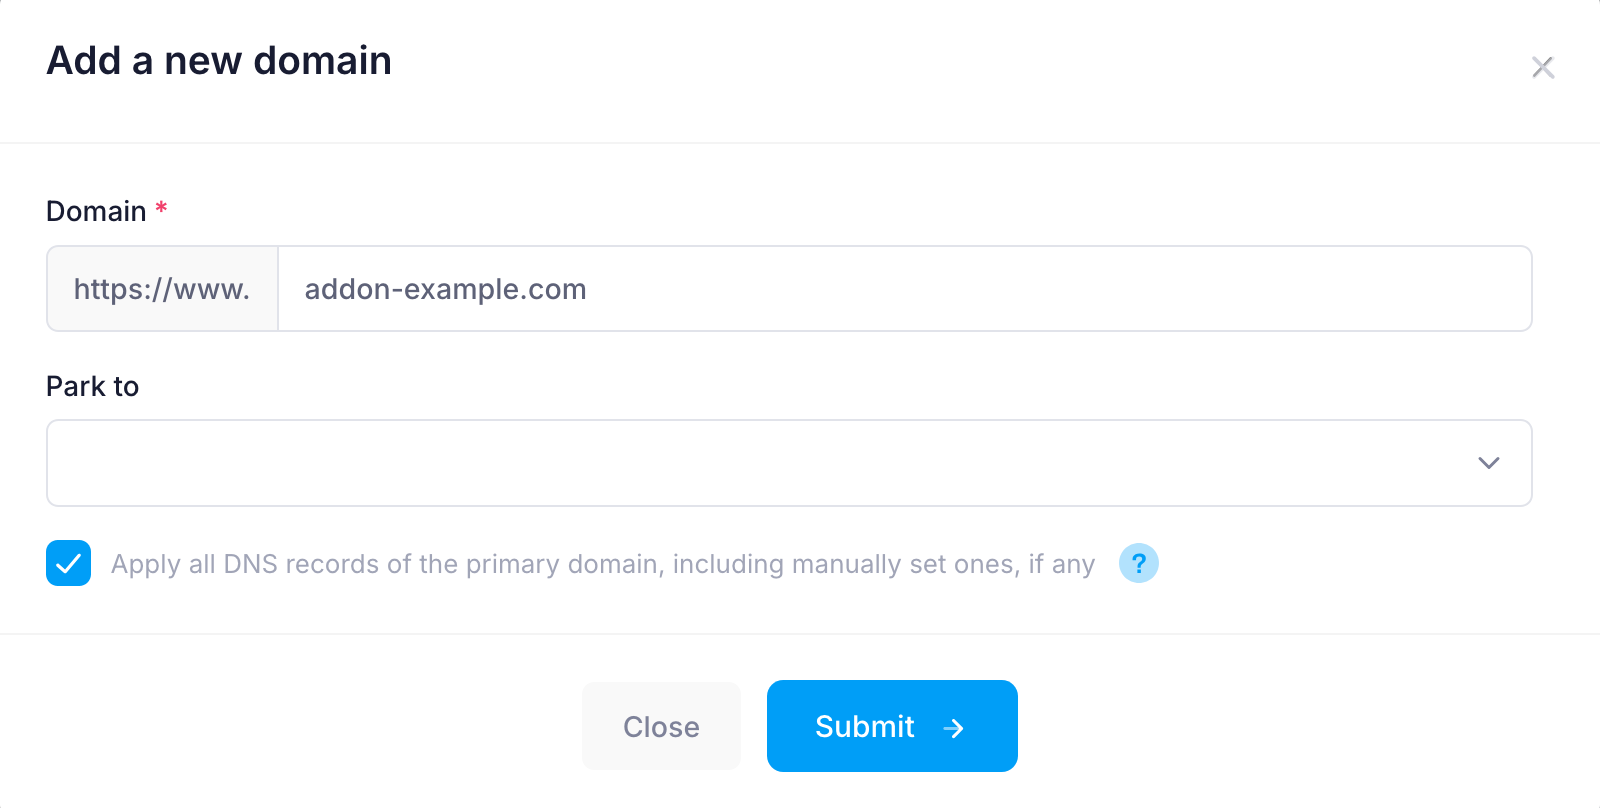
To create an addon domain, you should:
- Go to the Domains section.
- Click on the Add button.
- Type the new domain in the Domain field.
- Leave the Park to field empty.
- Uncheck Apply all DNS records of primary domain, including manually set ones, if any if you wish.

Important: When making changes to an addon domain, you would first need to choose it from the Domain: drop-down:

Please ensure the domain name you are setting up as an addon domain is registered in advance.
Addon domains will be listed with an [A] to the left in the interface.
Parking domain names to addon domains
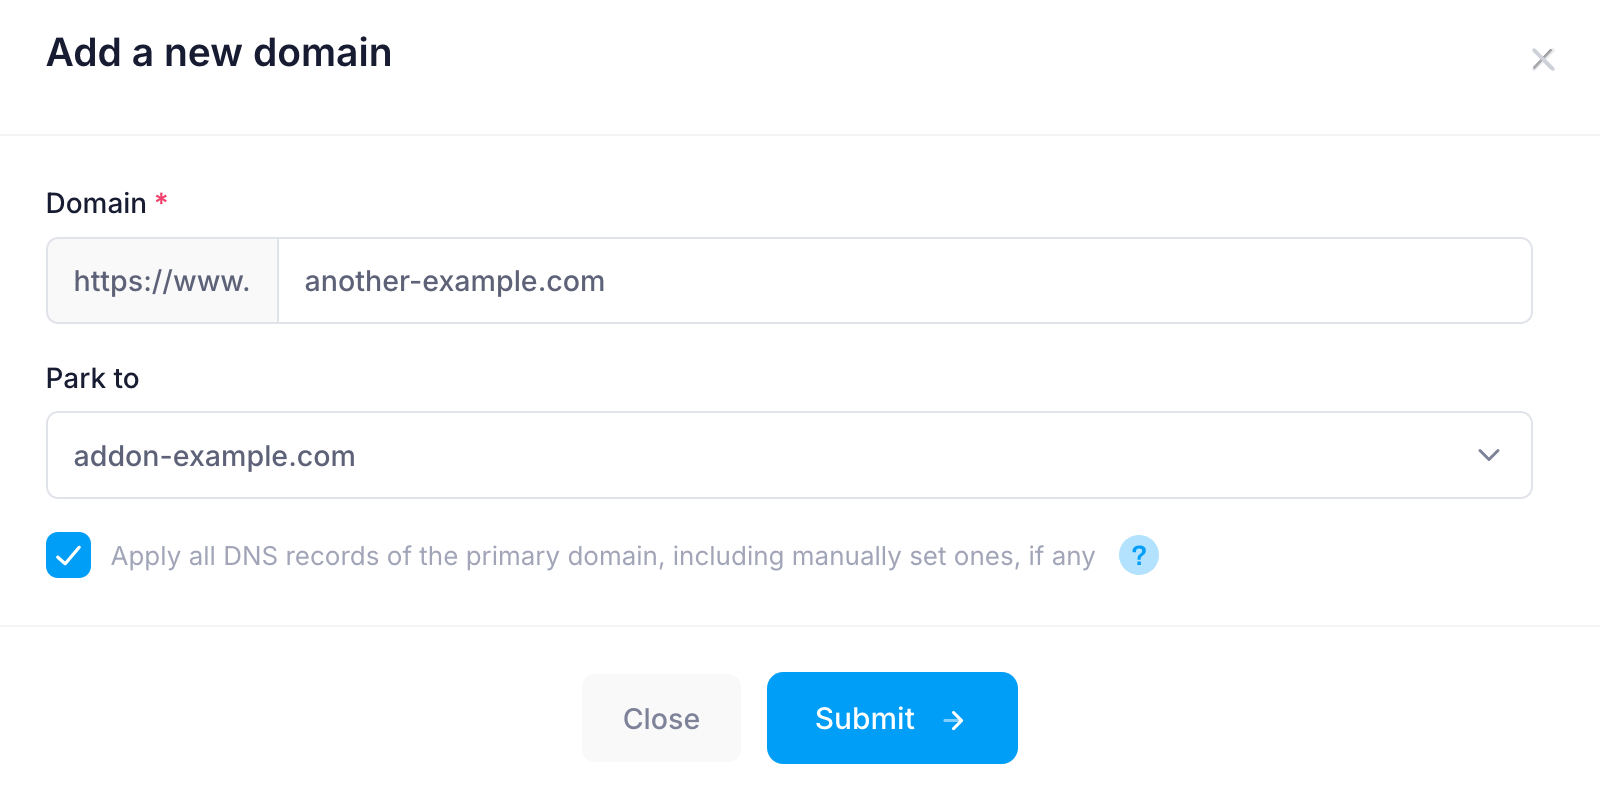
To park a domain to an addon domain, you should:
- Go to the Domains section.
- Click on the Add button.
- Type the new domain in the Domain field (another-example.com in the screenshot below).
- Set the Park to field to the addon domain (addon-example.com in the screenshot below).
- Uncheck Apply all DNS records of primary domain, including manually set ones, if any if you wish

Managing the files of addon domains
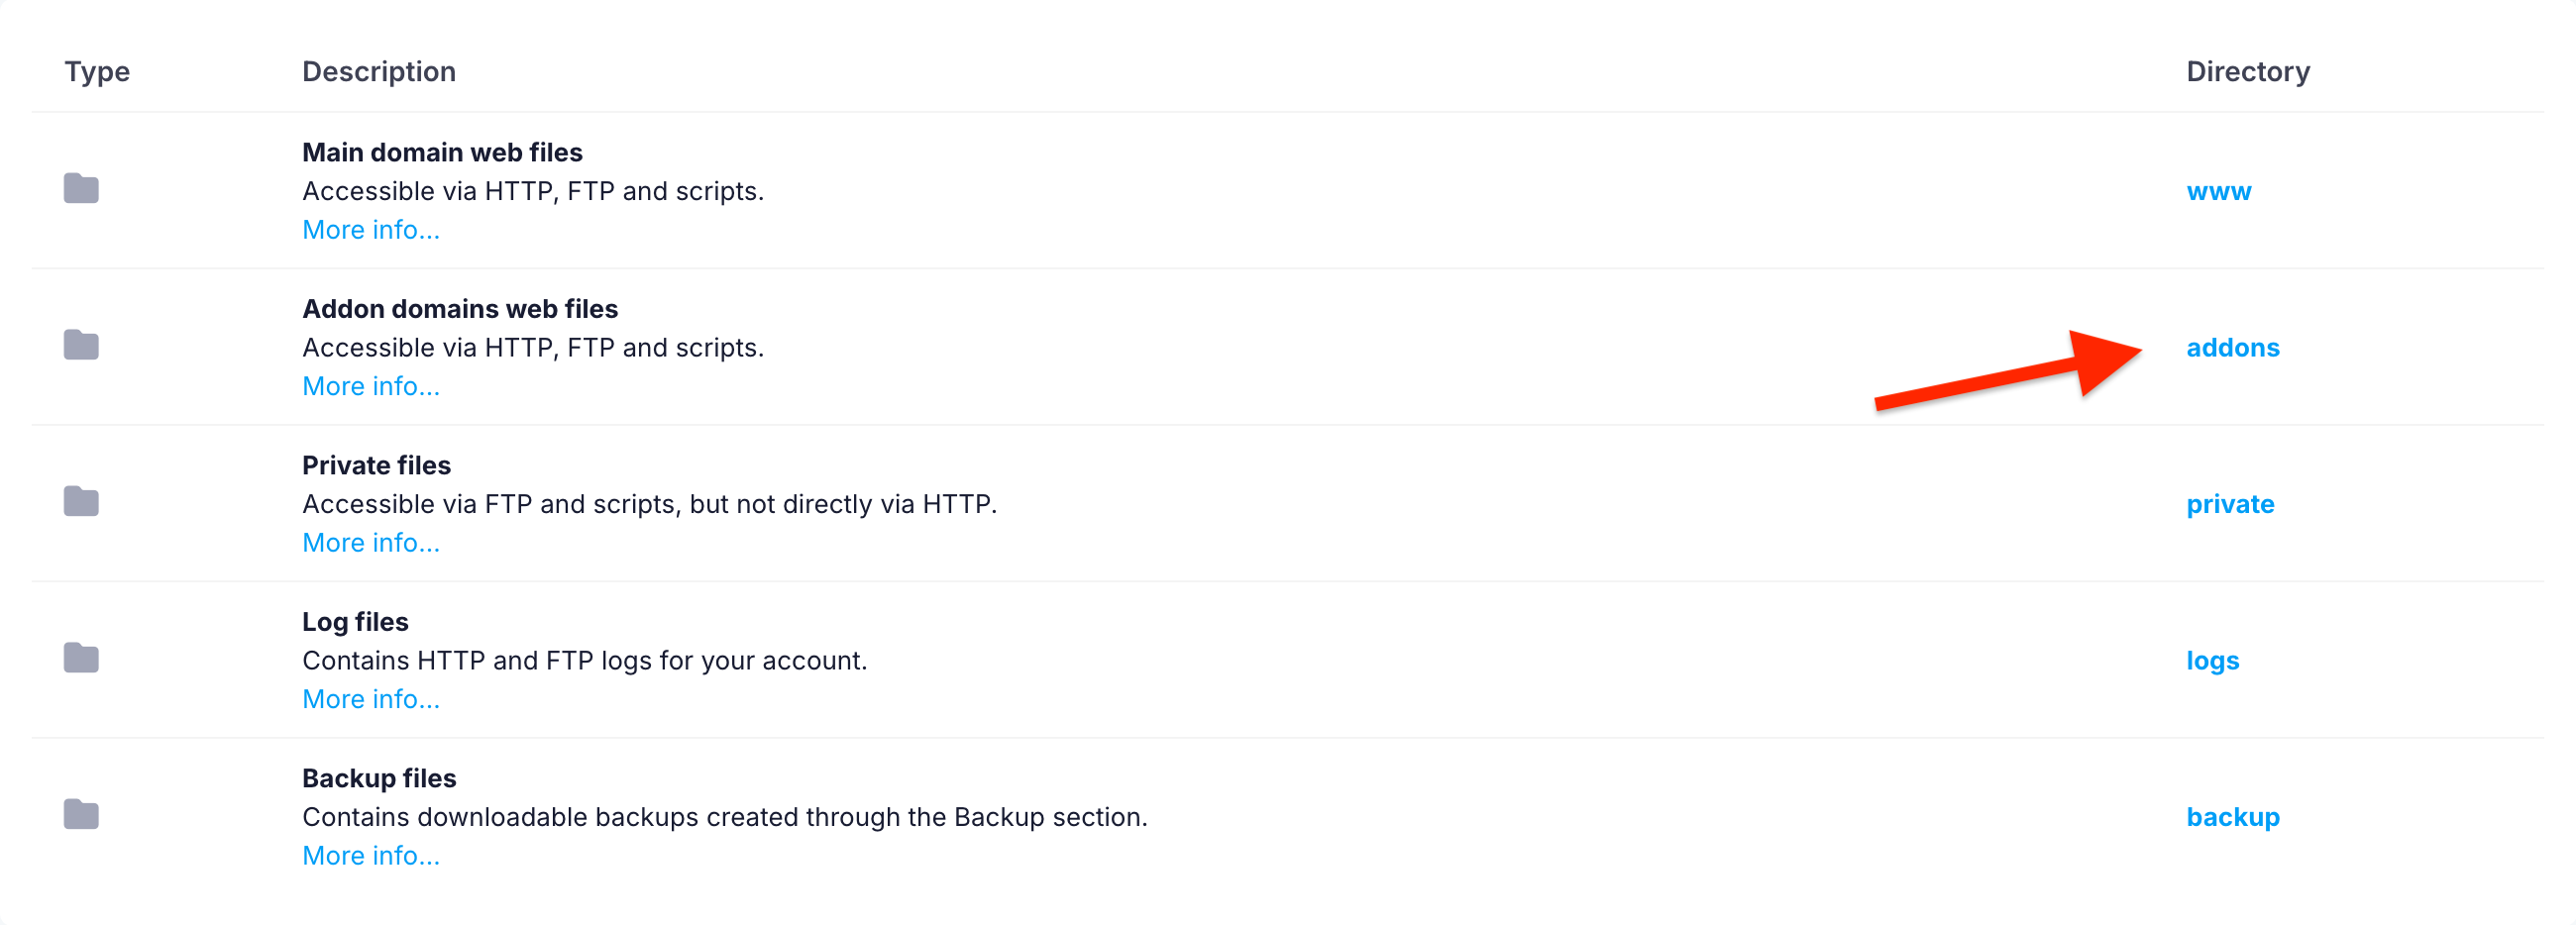
To manage the files of an addon domain, you should:
- Go to the File Manager section.
- Click on the addons link.
- Click on the addon domain.
The files of your addon domains are located in the /home/username/addons/ (where username is the actual username of your hosting account):
Detailed information on how to use the File Manager of the Control Panel can be found in the "File Manager" article.
Managing the mailboxes of addon domains
To manage a mailbox for an addon domain, you should:
- Go to the Mail Manager section.
- Choose the addon domain from the Domain: drop-down.
- Create, delete, or manage a mailbox. Any changes you make now will affect only mailboxes of the addon domain.

Detailed information on how to use the Mail Manager of the Control Panel section is available in the "Mail Manager" section.
Managing the mailing lists of addon domains
To create, delete, or manage mailing lists of an addon domain, you should:
- Go to the Mailing List section.
- Choose the addon domain from the Domain drop-down menu.
- You can now create, delete, and manage mailing lists for your addon domain.
Detailed information about the Mailing List section of the Control Panel is available in the "Mailing Lists" section.
Managing the PHP settings of addon domains
- Go to the PHP Settings section.
- Choose the addon domain from the Domain drop-down menu.
- You can manage the PHP settings of your addon domain.
Detailed information about the PHP Settings section of the Control Panel is available in the "PHP settings" article.
Setting up web access protection for addon domains
- Go to the Protection section.
- Click on Web Access Protection.
- Choose the addon domain from the Domain drop-down menu.
- You can set up web access protection for your addon domain.
Detailed information about the Web access protection section of the Control Panel is available in the "Web access protection" section.
Creating URL redirections for addon domains
- Go to the Redirect URL section.
- Choose the addon domain from the Domain drop-down menu.
- You can create URL redirections for your addon domain.
Detailed information about the Redirect URL section of the Control Panel is available in the "Redirect URL" article.
Enabling server-side caching for addon domains
- Go to the Server-side Caching section.
- Choose the addon domain from the Domain drop-down menu.
- You can manage the server-side caching for your addon domain.
Detailed information about the Server-side Caching section of the Control Panel is available in the "Server-side Caching" section.
Viewing site statistics for addon domains
- Go to the Site Statistics section.
- Choose the addon domain from the Domain drop-down menu.
- You can view site statistics and manage the users for the site statistics pages for your addon domain.
Detailed information about the Site Statistics section of the Control Panel is available in the "Site Statistics" article.
Managing the subdomains of addon domains
- Go to the Subdomains section.
- Choose the addon domain from the Domain drop-down menu.
- You can create and manage the subdomains of your addon domain.
Detailed information about the Subdomains section of the Control Panel is available in the Subdomains article.