Running Next.js

In this article, you can find instructions on installing and using Next.js with the WebApps platform.
Prerequisites
To use Next.js, there are a few settings to check and configure on your hosting account.
- There must be a WebApps section in your hosting Control Panel. If you do not see a WebApps section, then this tutorial is not suitable for your particular hosting environment. You can contact us via our ticketing system for further assistance.
- SSH access must be enabled for your account via the hosting Control Panel > SSH Access section.
Installation
To run Next.js as a web application, you will have to connect to your account via SSH and follow the steps listed below.
- Create a directory for Next.js (e.g. ~/private/nextjs), and navigate to it with these commands::
mkdir /home/$USER/private/nextjs
cd /home/$USER/private/nextjs - Create a WebApps project for Next.js (e.g. next) using the following sureapp CLI command:
sureapp project create \
--engine "node" \
--engine-version "lts" \
--release-dir "/home/$USER/private/nextjs/" \
next - Log into the Next.js application (e.g. next) using this command:
sureapp project shell next - Install the latest version of the Node.js Package Manager (npm):
npm install -g npm@latest - Create a Next.js start application using the default template by running the following command and going through the prompts that appear in the console:
npx --yes create-next-app@latest . - Create a static copy of the Next.js application using this command:
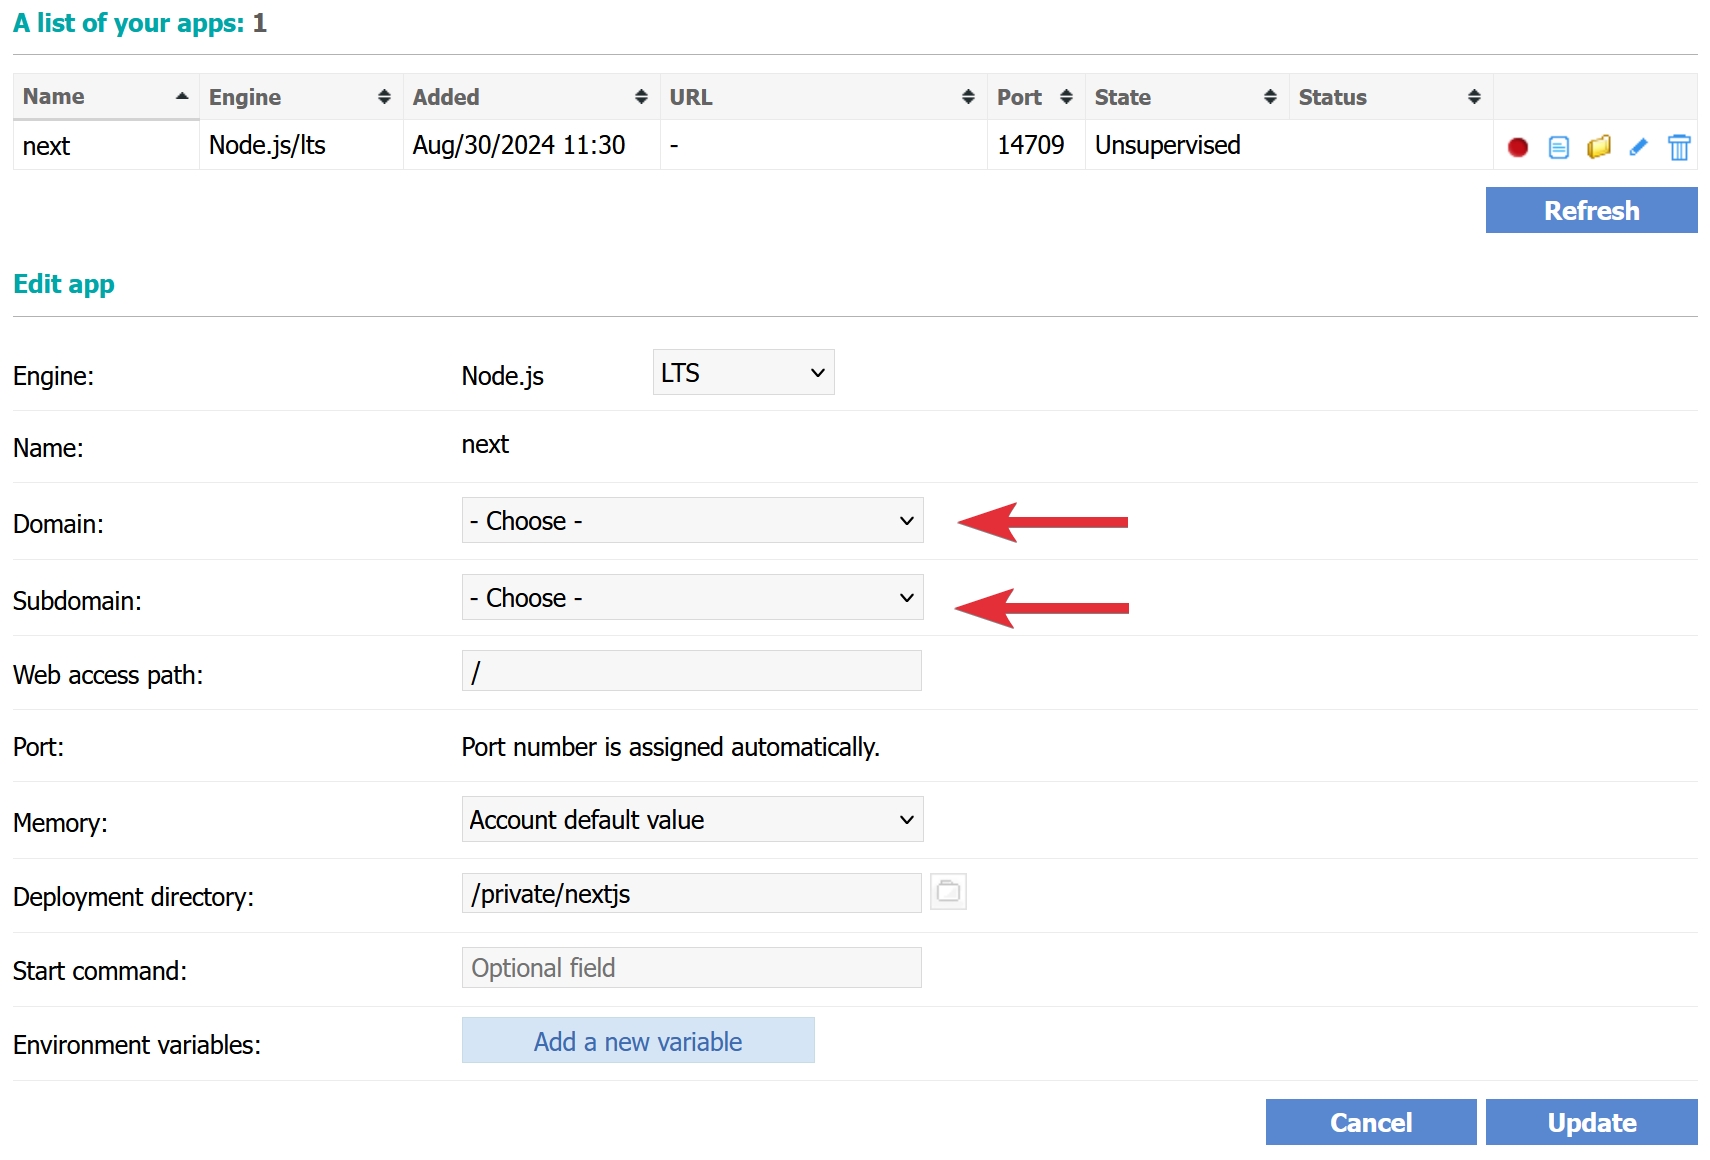
npm run build - Choose the URL where you would like to access the Next.js application via the WebApps section of the hosting Control Panel by clicking on the
 button (pencil icon) next to the next web application. Select the domain and subdomain where Next.js will run on the screen that appears via the available drop-down menus. To apply the changes, click on the Update button.
- Enable the Next.js web application (e.g. next) by clicking on the button with a red circle (
 ) icon next to it or by using the sureapp CLI tool:
sureapp service manage --enable next - Open the selected URL for the Next.js application (e.g. http://nextjs.example.com) in your browser.
