Adding SRV records
| DNS records added via the DNS Manager section of the Control Panel take effect only when the domain name uses the DNS service of your hosting account. |
To add an SRV record, you should:
- Go to the DNS Manager section.
- Click on the Create button to the right of the interface.

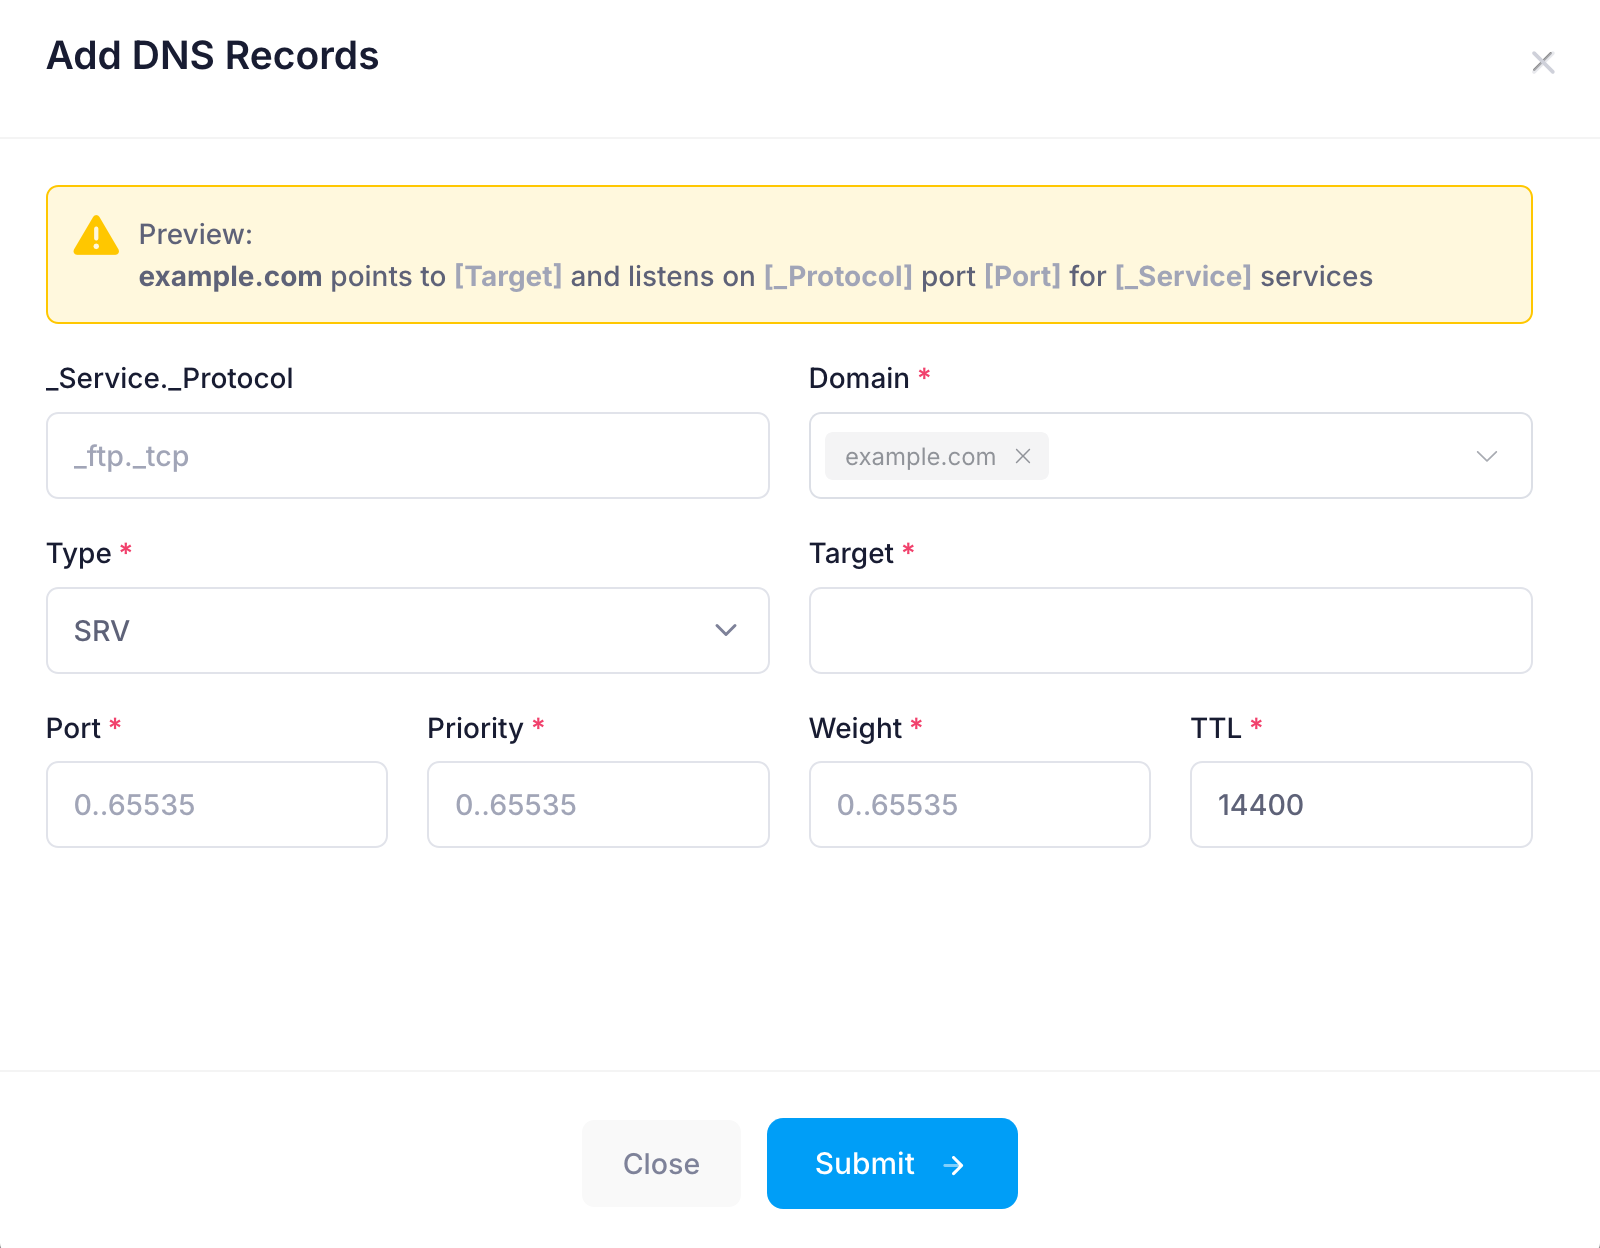
- Fill in the following fields:
_Service._Protocol: Enter the service and protocol (e.g., _sip._tcp).
Domain: You can choose to apply the changes to one or more domain names through the Domain selector.
Type: Choose SRV from the drop-down menu.
Target: Enter the hostname of the server providing the service (e.g., sipserver.example.com).
Port: Enter the port number on which the service is running.
Priority: Set the priority for the service.
Weight: Set the relative weight for records with the same priority.
TTL: This is the time-to-live value of the record. The default is 14400 seconds. We would recommend leaving the default in most cases.
- After applying all values, click on the Submit button.