Using maintenance mode in WordPress
What is the WordPress maintenance mode?
The WordPress maintenance mode allows you to temporarily show a maintenance page to your website visitors. This is helpful if you need to make changes, fix problems, or install/update new plugins or themes on your WordPress website. When you enable the maintenance mode for WordPress, your website visitors will see a message (or a custom page) informing them that the website is undergoing maintenance.
What are the differences between the default WordPress maintenance mode and the maintenance mode of a plugin/theme?
The default WordPress maintenance mode is enabled by adding a .maintenance file to the root folder of your WordPress installation. WordPress enables maintenance mode during core, plugin, and theme updates/installations. While the default maintenance mode is enabled for the website, all public access to it will be blocked - none of your posts/pages will be visible, and the WordPress Dashboard will not be accessible. Maintenance mode causes the website to return a 503 error, which informs search engines that the website is down only temporarily. The WordPress maintenance mode will be automatically deactivated 10 minutes after it has been enabled. This helps prevent unnecessary downtime of websites after a failed update, for example.
There are many WordPress maintenance plugins and themes available that provide an easy way to enable maintenance mode and set a custom maintenance page. They may offer various features, like countdown timers, email notifications, and customizable pages, allowing you to personalize your website's maintenance page to your liking.
Note: When updating the core, plugins, or themes, WordPress should automatically enable its maintenance mode. Once the update process completes, maintenance mode should be automatically disabled by WordPress. Even if you manually enable maintenance mode using this tool, when the core, plugins, or themes get updated, WordPress should automatically disable maintenance mode.
If you use a maintenance plugin/feature, you may still be able to access the WordPress Dashboard. This will allow you to make changes to the website (like install new plugins/themes, apply updates, or perform any other tasks) without affecting the visitor's experience. Once you complete the maintenance tasks, you can disable maintenance mode, and the website will be accessible to visitors again.
In general, the differences are that the default WordPress maintenance mode limits public access to the website, while with a maintenance plugin/feature, you get better control over what gets disabled and what information is provided to your website visitors.
Enabling/disabling the WordPress maintenance mode via the hosting Control Panel > WordPress Manager
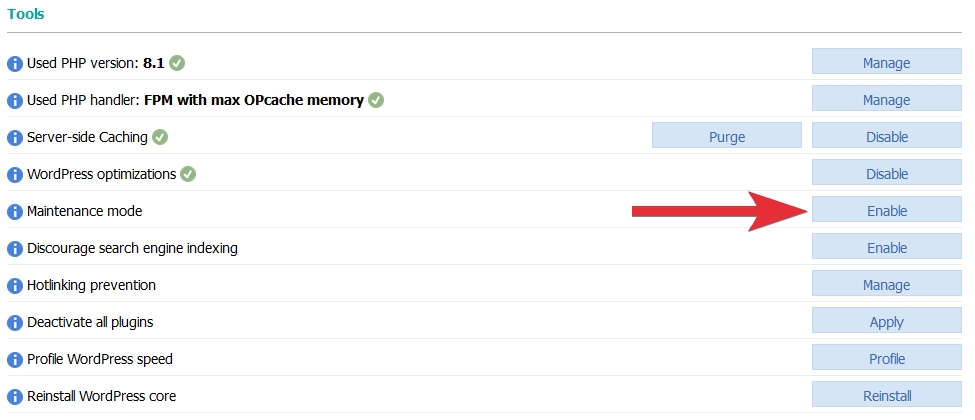
The hosting Control Panel > WordPress Manager provides easy control over the WordPress maintenance mode. To enable/disable the WordPress maintenance mode for your website, you need to access the management page of your WordPress installation via the hosting Control Panel > WordPress Manager, and simply click on the Enable or Disable button next to the Maintenance mode tool. If you use this Maintenance mode tool instead of manually adding a .maintenance file to your WordPress directory, the WordPress maintenance mode will last until you disable the maintenance mode (manually or after a plugin or a theme is installed or updated), and access to the WordPress Dashboard will be available.
