Configuring Thunderbird Lightning (CalDAV)
You need to follow these steps to configure the Thunderbird Lightning add-on for accessing a Baïkal CalDAV installed on your account. The Thunderbird Lightning add-on can be obtained at
https://addons.mozilla.org/thunderbird/addon/lightning/
Please replace:
|
username with your Baïkal username |
1. Open Thunderbird.
2. Choose "File" -> "New" -> "Calendar".
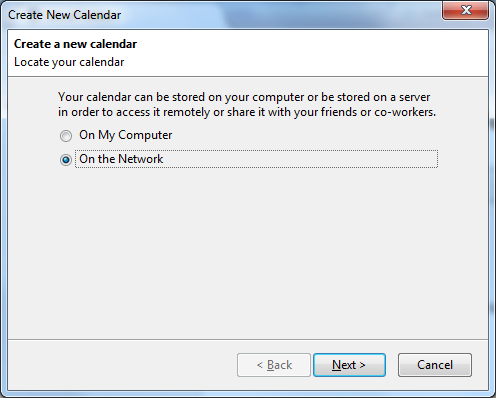
3. Choose "On the Network". Click on the "Next" button.

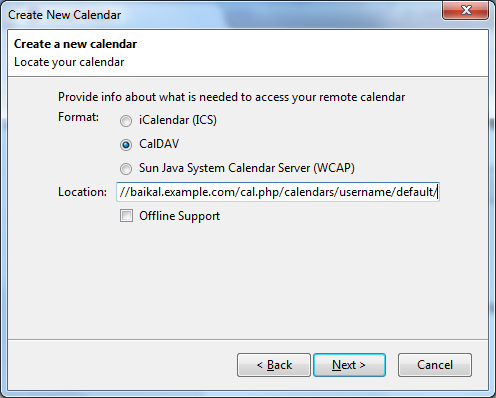
4. Choose the "CalDAV" option.
5. In the "Location" field, you need to enter "http://baikal.example.com/html/cal.php/calendars/username/default/" where "baikal.example.com" is the subdomain where you installed Baïkal, "username" is the Baïkal username for the calendar, and "default" is the name of your calendar.
Note: In Baïkal 0.8.0+, you can view the configuration settings by clicking on the "i" button next to each calendar within the Baïkal CalDAV dashboard.
Click on the "Next" button.

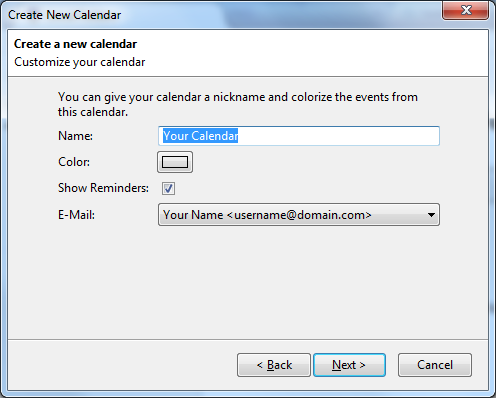
6. In the "Name" field, you need to enter the desired calendar name. You can choose whatever you want.
Click on the "Next" button.

7. Click on the "Finish" button on the next screen.
8. Thunderbird will ask you for your Baïkal username and password. Enter them, check the "Use Password Manager to remember this password" option, and click on the "OK" button.