Microsoft Outlook 2013 (IMAP)
To configure Microsoft Outlook 2013 to send and receive email with the IMAP protocol, please follow the steps below. Please replace:
 |
username@example.com with your email address example.com with your domain name |
1. Open Microsoft Outlook 2013.
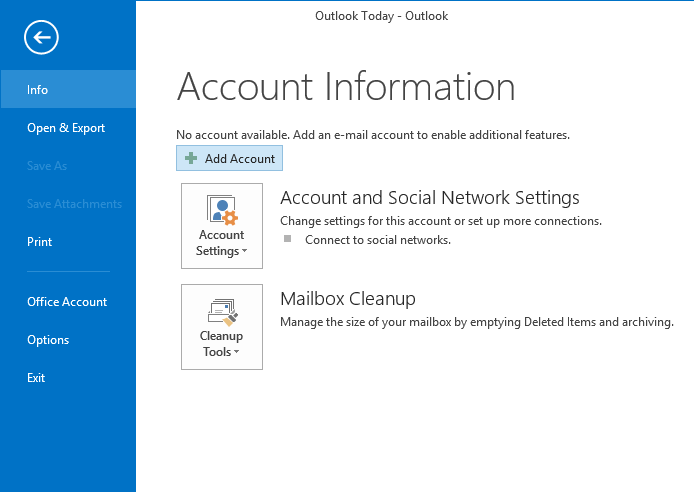
2. Choose "File" -> "Info" -> "Add Account".
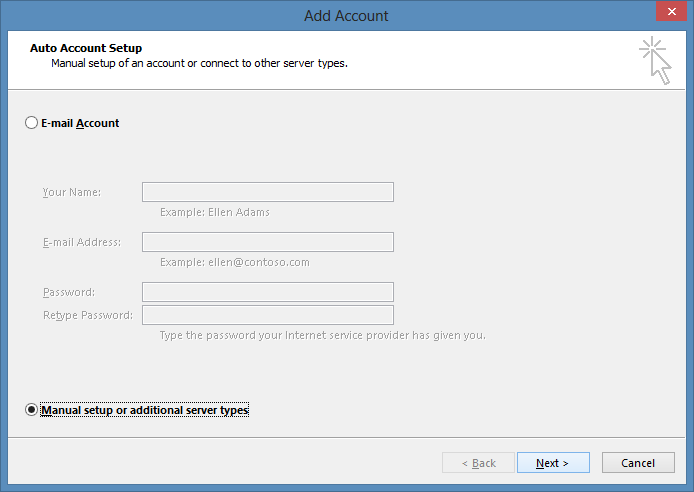
3. Select "Manual setup or additional server types" and click "Next".
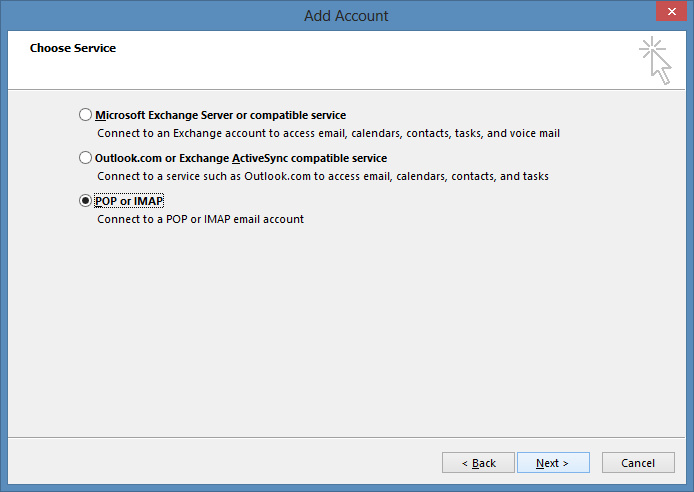
4. Choose "POP or IMAP" and click "Next".
5. In the "Your name" field you should enter the name which you would like to appear on the messages you send.
You need to enter your e-mail address username@example.com in the "Email Address" field.
For incoming and outgoing mail servers you should use mail.example.com.
Enter username@example.com in the "User Name" field. In the "Password" field you need to enter the current password for this particular mailbox.
Set "Account Type" to IMAP.
Leave the "Require logon using Secure Password Authentication (SPA)" option unchecked.
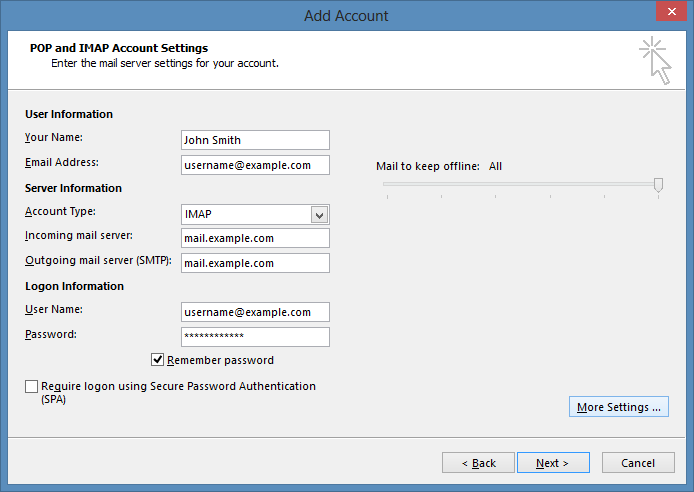
Click "More Settings ...".
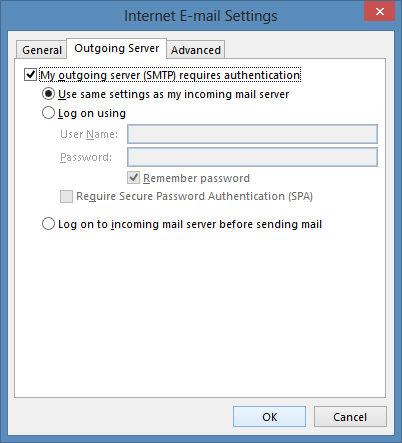
6. Click on the "Outgoing Server" tab. Mark the "My outgoing server (SMTP) requires authentication" option and leave the default "Use same settings as my incoming mail server" option selected.
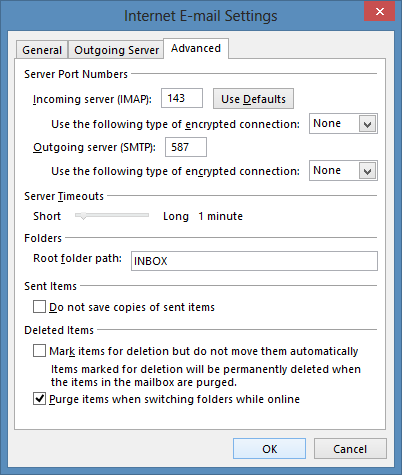
7. Click on the "Advanced" tab.
Set the "Outgoing server (SMTP)" port to 587.
You need to specify the following value in capital letters in the "Root folder path" text field:
INBOX
Click "OK".
8. Click "Next". The account settings will be tested. Click "Close" and then "Finish".