Windows Live Mail 2011 (POP3)
To configure Windows Live Mail 2011 to send and receive email using our servers through POP3, please follow the steps below. Please replace:
 |
username@example.com with your email address example.com with your domain name |
1. Open Windows Live Mail 2011.
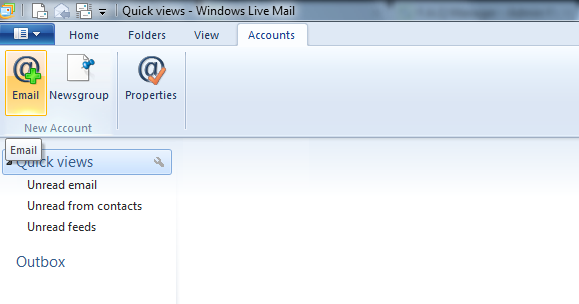
2. Choose "Accounts" -> "Email".

3. Fill out the "Add your email accounts" form.

Enter your email address in the "Email address" field. Replace username@example.com from the above example with your actual email address.
In the "Password" field you need to enter the current password for this particular mailbox.
In the "Display Name for your sent messages" field you should enter the name, which you would like to appear on the messages you send.
Select the "Manually configure server settings" option.
Click the "Next" button.
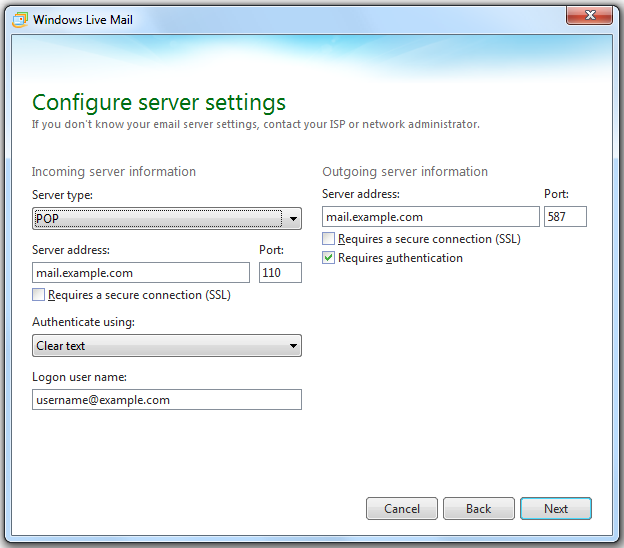
4. Fill out the "Configure server settings" form.

Set the type of the incoming mail server to POP.
For incoming and outgoing mail servers use mail.example.com (replace example.com with your domain name).
Make sure the incoming server port is set to 110.
Set the outgoing server port to 587.
Select the "Requires authentication" option.
From the drop-down menu "Authenticate using", choose "Clear text".
Enter your email address in the "Logon user name" field. Replace username@example.com from the above example with your actual email address.
Click the "Next" button.
5. Click the "Finish" button.