Apple Mail for Mac OS X 10.5 (IMAP & SMTP over SSL)
To configure your Apple Mail application for Mac OS X 10.5 (Leopard) to send and receive email using IMAP and SMTP over SSL/TLS, please follow the steps below. Please replace:
 |
username@example.com with your email address example.com with your domain name your_server.com with your server's host name (you can find your server's host name listed in the upper left corner of your Control Panel) |
1. Open Apple Mail.
2. Choose "Mail" -> "Preferences..."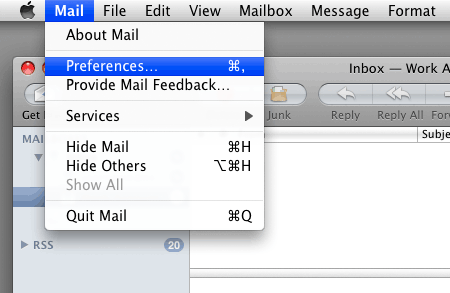
3. Open the "Accounts" tab and click on the "+" / "Create an account" button.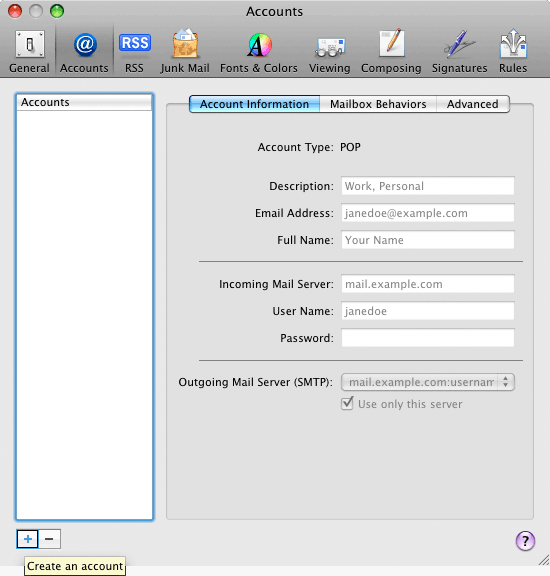
4. In the "Full Name" field you should enter the name, which you would like to appear on the messages you send. In the "Email Address" field you should type the email address you are configuring. In the "Password" field you need to fill in the current password for this particular mailbox.
Click on the "Continue" button.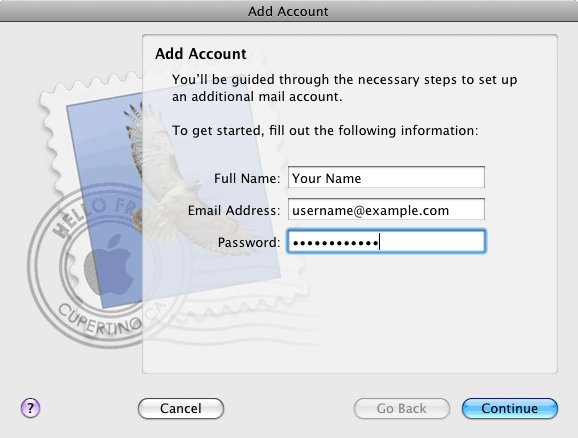
5. Set "Account Type" to "IMAP".
In the "Description" field you need to enter a short description for your account in your email client. This name would show up only in your own email program. You can set a name such as "Work Account", "Sales mail", "John" etc.
For "Incoming Mail Server", you should use mail.your_server.com
In the "User Name" field you need to enter username@example.com.
In the "Password" field you need to fill in the current password for this particular mailbox.
Click on "Continue".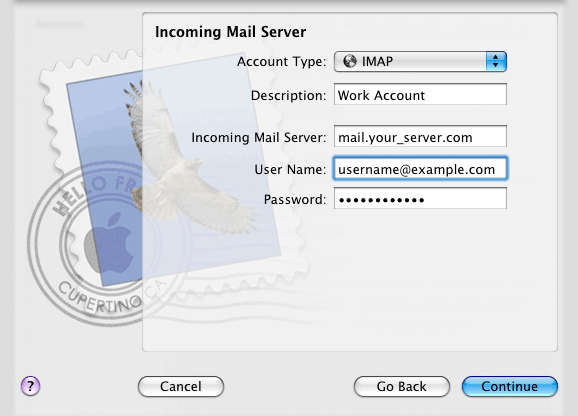
6. For "Outgoing Mail Server" you can use mail.your_server.com
If you wish to use only this outgoing mail server for all of your accounts, mark the "Use only this server" option.
Check "Use Authentication" and enter username@example.com in the "User Name" field and the corresponding password in thee "Password" field.
Click on "Continue".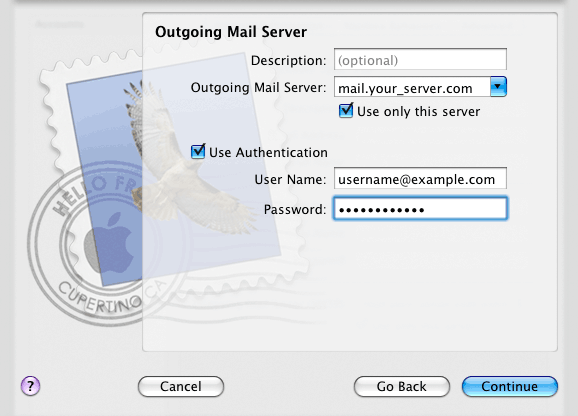
7. You need to verify your settings, and confirm them.
To proceed with the configuration, unmark the "Take account online" option and click "Create". If you want to change some of the settings, click "Go Back".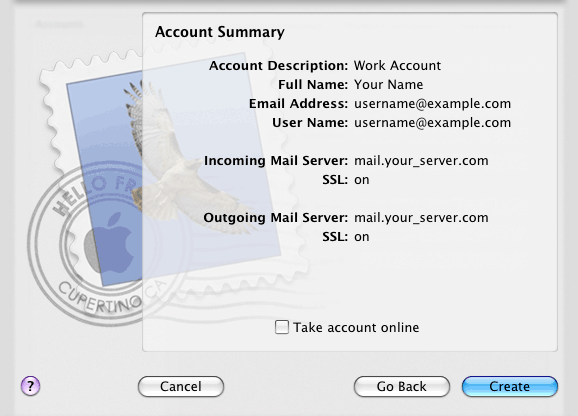
8. You should see the new mail account listed in the "Accounts" section. Click on "Outgoing Mail Server (SMTP)" and choose "Edit Server List...".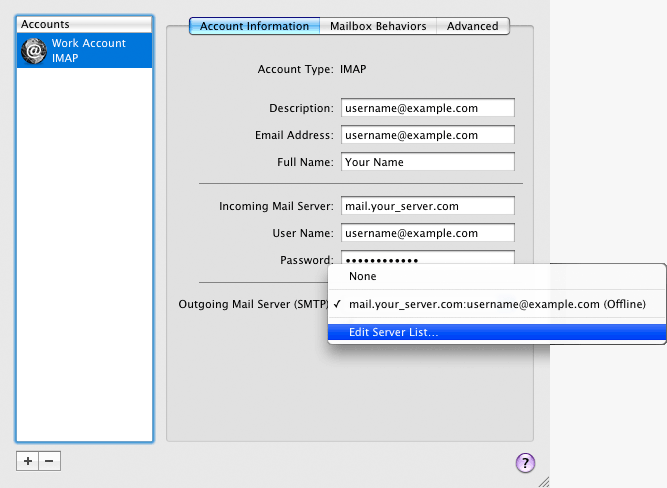
9. Click on "Advanced". Choose "Use custom port" and enter 587.
Click on "OK".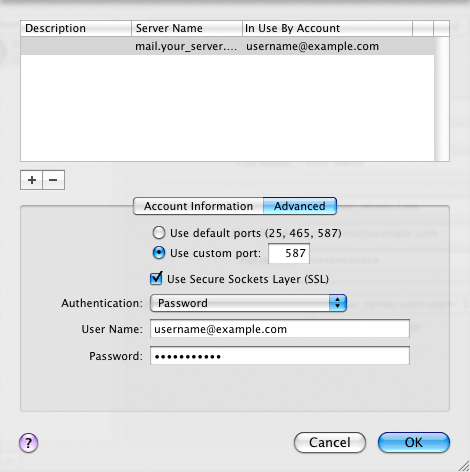
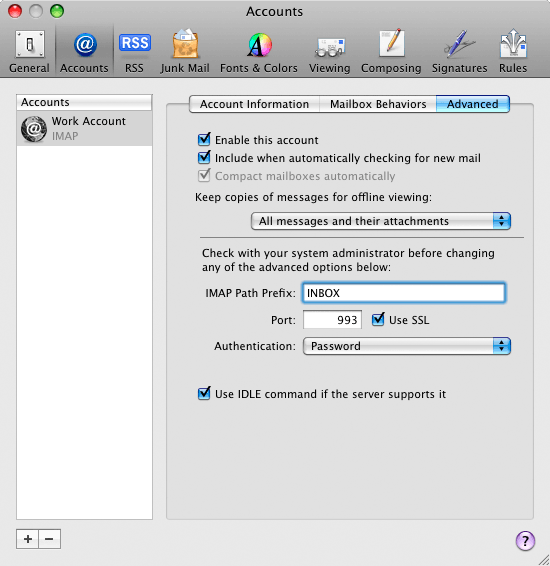
10. Click on "Advanced" and enter INBOX in the "IMAP Path Prefix" field. Check the option "Use SSL".