Uploading with Fetch for Mac
To upload your site using Fetch, please follow these steps:
1. Start your Fetch program.
2. From the Menu bar click on File and select New Connection. If you have no previously saved connections, Fetch will open the New Connection screen when you start it.

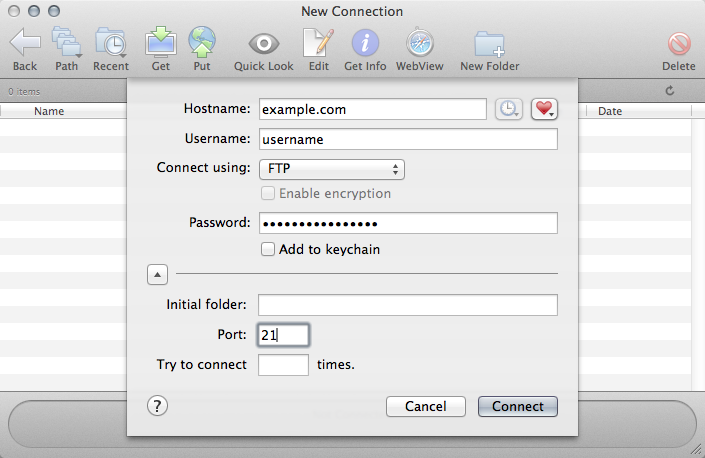
Expand the New Connection screen using the arrow button. You will need to enter information for the following fields:
Hostname: Enter your domain name, e.g. example.com. You can also use the hostname of the server on which your account is hosted. This information can be found in the Welcome e-mail message of your hosting account or the hosting Control Panel.
In the "Username" and "Password" fields you need to specify the FTP login details you want to connect with. Normally, you would want to connect with your main Control Panel username/password pair. In case you want to connect with an FTP subuser you previously created at the FTP Manager section of your Control Panel, you need to specify the login details for that particular user.
Select FTP from the Connect using menu.
Leave the Initial folder field empty.
If you need to publish to a subdomain on your site, please use "/www/subdomain_name", where subdomain_name must be replaced with the name of your subdomain. For example, if you have sub.your_domain.com, in the Initial folder field you should enter /www/sub.
Enter 21 for Port.
3. Click the Connect button. Your Fetch program will connect to the server.
4. To upload files to the server, use the Put icon of the Fetch interface. Select files from your computer's hard drive, then click Put to upload them.